ローライトでのラージマウスバス釣り
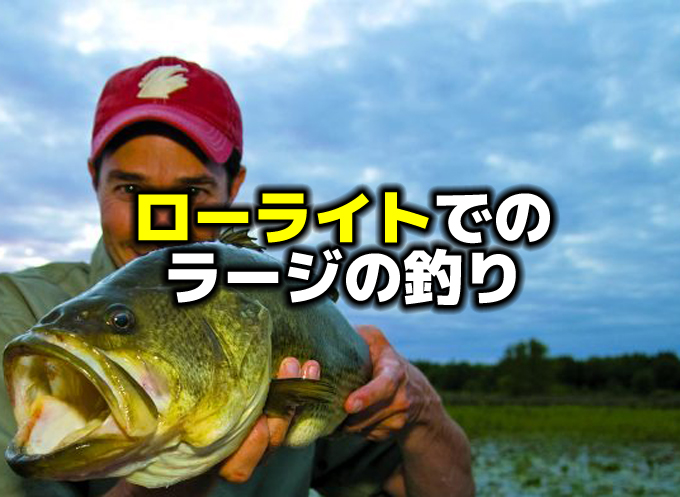
Photo by on the water.com
こんにちは!店長の小山です!
本日は海外サイトより、”Three Strategies for Low-Light Largemouth”という記事を引用してご紹介いたします。
引用先:onthewater.com ”Three Strategies for Low-Light Largemouth”BY TIM ALLARD JANUARY 22, 2019
一般的に、暖かい水を好むとされているラージマウスバス。
ものすごく過酷な真夏の気候や強い日差しがあるときを除いては、暖かいところにいることで活発になり、エサを追うようになります。
それは私たちも同じです。真夏に外に出てラーメンを食べるのは少し抵抗があります。快適な温度のところにいることで、色々なものが食べたくなりますよね。そして強い日差しがあるときはサングラスをかけ、日焼け止めを塗ったりUVカット素材の服を着たりします。
バスは強い日差しの時はカバーの奥に隠れます。同じです。
強い光が水面に射し込むときはカバーの中を釣るということはどのバス釣り本を読んでも書いてあることですし、非常に理にかなっていて納得できます。
では日が傾く朝や夕方はどうでしょうか。
太陽が低い位置にあること、または曇りや雨のときの太陽光が弱い状態のことをローライトコンディションと言いますが、そんな時はもちろん、釣りも変わります。
特に朝晩のフィールドの状況を思い出してみると、小魚や虫が水面をつついている場面を多く見ます。そういう小魚を時々バスが襲っているのを見ることができますよね。この時というのはバスはカバーの奥から出てきて小魚を襲っているということになるのですが、これはつまりバスだけでなく水中や水辺の生き物全体が活発になっているということなのでしょう。
釣り方が変わるのは当然のことと言えると思います。
では、そのローライトコンディションの時というのは、実際にどんな釣りが有効になるのでしょうか。
この記事は、アメリカの釣り専門メディア「On the Water」の記事で、ローライトコンディションの時のラージマウスバスの有効な釣り方を3つ、紹介してくれています。
日中はバスの居場所が絞りやすいということもあり、ローライトの釣りはバスの居場所がつかみづらく、いまいち苦手だという方は意外と多いものです。
そう言いう方はぜひこれを読んでみてはいかがでしょうか。私も早速読まなくては。
ベジテーションマットエリアでのフロッグ
If I had to pick one spot to chase largemouth in low light, it’d be emergent and floating vegetation. Lily pads, rice, arrowheads, slop, clumps of weeds—the list goes on. This greenery is prime turf for prowling largemouth during low light because baitfish, frogs, salamanders, rodents, birds, and bugs all live in these marshy areas.
Generally, the bigger the area, the better because it gives more square footage for bass to live. More space can mean better numbers and larger fish. Backwater areas in large rivers are prime locations; in lakes, look to large bays and coves. The property value increases when a tributary is present because current keeps oxygen and nutrients flowing into the area.
Focus efforts on points and bends in the vegetation, which act as travel corridors for bass moving in and out of the weeds. Expect active fish to be on the outer edge and watch for patches of isolated cover. It may seem counterintuitive, but big bass often hold under small, remote pieces of vegetation or timber. Open pockets within mats of weeds are also prime casting targets.
A hollow-belly frog is a top pick for fishing these spots. Popular choices include the Booyah Pad Crasher Frog, Jackall Iobee Frog, Lunkerhhunt Lunker Frog, LiveTarget Hollow Body Frog, Reaction Innovations Swamp Donkey, Snag Proof Bobby’s Perfect Frog, Spro Dean Rojas Bronzeye Frog, and Terminator Walking Frog. A soft-plastic toad Texas-rigged with a wide-gap, offset hook is an appropriate alternative.Being weedless, frogs run through thick cover well. This lets an angler cast a frog on shore, then slip in the water with a gentle splash–a maneuver that fools big bass. A frog also “matches the hatch,” so to speak. It’s a Kermit copycat, but also decoys other surface-swimming snacks such as mice or a struggling sunfish. Fishing a frog is not brain surgery. Cast it out and work it in. During the day, I generally fish a frog quickly to portray a panicking scurry across the surface and trigger reaction strikes from bass. As twilight arrives, a lazier pace is better. A bass’ striking accuracy can suffer as light fades, so slow down and add pauses to make it easy for fish to find and eat the bait.
Another low-light approach is getting the frog into an opening in the weed growth, and then using rod twitches to move it side to side with a walk-the-dog action. Add pauses. When you know bass are in the area, this tactic gets them biting. At times, bass smack or push a frog first, then come back a second time to eat it.
I use a 7-foot 4-inch, heavy casting rod when fishing frogs because it delivers the power and leverage for pulling big bass from thick weeds. A high gear-ratio reel that winches in 30 inches of line per reel crank also helps clear the bass of the debris. I tie frogs to 65-pound-test high-vis braid. The yellow string is easy to spot, making it easy to locate the frog after briefly taking my eyes off the bait. I color the last 10 feet of line with black permanent marker to keep the business end stealthy.
私がローライト時にラージマウスバスを釣るために1つの場所を選ぶとしたら、リーズまたはフローティングマットでしょう。リリーパッド、イネ科の植物、アローヘッド(葉が矢尻のような形の水生植物)、浮芝、ウィードなどなどいろいろ挙げられます。ベイトフィッシュ、カエル、サンショウウオ、げっ歯類、鳥、昆虫などすべてがこれらの湿地帯に住んでいるので、このベジテーションというのは、ローライト時になるとラージマウスがフィーディングするときに回ってくる主なエリアになります。
一般的に、大きなエリアになるほどバスが住む面積も広くなるので良くなります。より広大なスペースほど魚は数も大きさも増えるということを意味します。大きな河川が流れ込むエリアは一等地です。湖では、大きなワンドを探してください。支流がある場合は、その流れが運び続ける酸素や栄養素が増えるため、その価値も上がります。
バスがベジテーションエリアを出入りするための移動経路となる水生植物の岬やカーブに焦点を当てます。高活性な魚がアウトサイドエッジにいることを期待し、孤立したパッチなどのカバーがないかにも注意してください。イメージに反するように思えるかもしれませんが、ビッグバスは小さく、すこし離れた場所にある植物の根元などに隠れていることもあります。ベジテーションマットの中にあるオープンポケットも、主に狙うべきスポットです。
中空フロッグはこれらのスポットを釣るための良い選択肢です。人気のルアーを挙げれば、Booyah Pad Crasher Frog(ブーヤー・パッドクラッシャーフロッグ)、Jackall Iobee Frog(ジャッカル・アイオビー)、Lunkerhhunt Lunker Frog(ランカーハント・ランカーフロッグ)、 Reaction Innovations Swamp Donkey(リアクションイノベーション・スワンプドンキー)、Snag Proof Bobby’s Perfect Frog(スナッグプルーフ・ボビーズパーフェクトフロッグ)、Spro Dean Rojas Bronzeye Frog(スプロ・ディーンロハスブロンズアイフロッグ)、Terminator Walking Frog(ターミネーター・ウォーキングフロッグ)があります。フロッグワームをワイドゲイプのオフセットフックでテキサスリグにしたものもいい選択肢です。
ウィードレス性能が高いフロッグは、ぶ厚いカバーもうまくスリ抜けます。この特色を生かし、アングラーは岸にフロッグを投げてから、バスに気付かせるように大きな水しぶきを上げながら水面に飛び込ませます。実際にカエルがいるフィールドならマッチザベイトになります。これはあくまでカエルを模した物ですが、ネズミや苦しむブルーギルなどを演出することもできます。フロッグの釣りは決して難しくありません。日中は、フロッグを素早く動かし水面でパニック状態になっているような演出をし、バスからのリアクションバイトを引き起こします。夕暮れになると、ゆったりしたペースが良くなります。光が少なくなることでバスの正確さがやや落ちるため、餌を見つけて食べやすくするために、スローダウンしてポーズも入れていきます。
ローライト時のもう1つのアプローチは、フロッグをウィードマットのオープンポケットに入れてから、ロッドをトゥイッチして左右に動かすドッグウォークアクションです。ポーズも入れます。バスがそのエリアにいると分かっている場合は、これでバイトに持ち込めます。時にはバスがはじめにミスバイトをしてルアーを弾いてしまっても、再び襲ってくる二度食いをすることもあります。
フロッグの釣りには7フィート4インチのヘビーアクションのベイトロッドを使用します。それはぶ厚いカバーからビッグバスを引き出すためのパワーがあるのと、てこの原理を利用できるためです。リールハンドル1回転当たり75センチのラインを巻けるハイギアのリールも、カバーのバスを釣るのに役立ちます。私はフロッグを65ポンドのPEラインに結びます。黄色いPEは見やすく、ルアーの場所が簡単にわかるのですが、魚にも見やすくなってしまうため、ルアーから3メートルほど離れたところまで黒いマジックで塗っておき、見切られにくくしています。
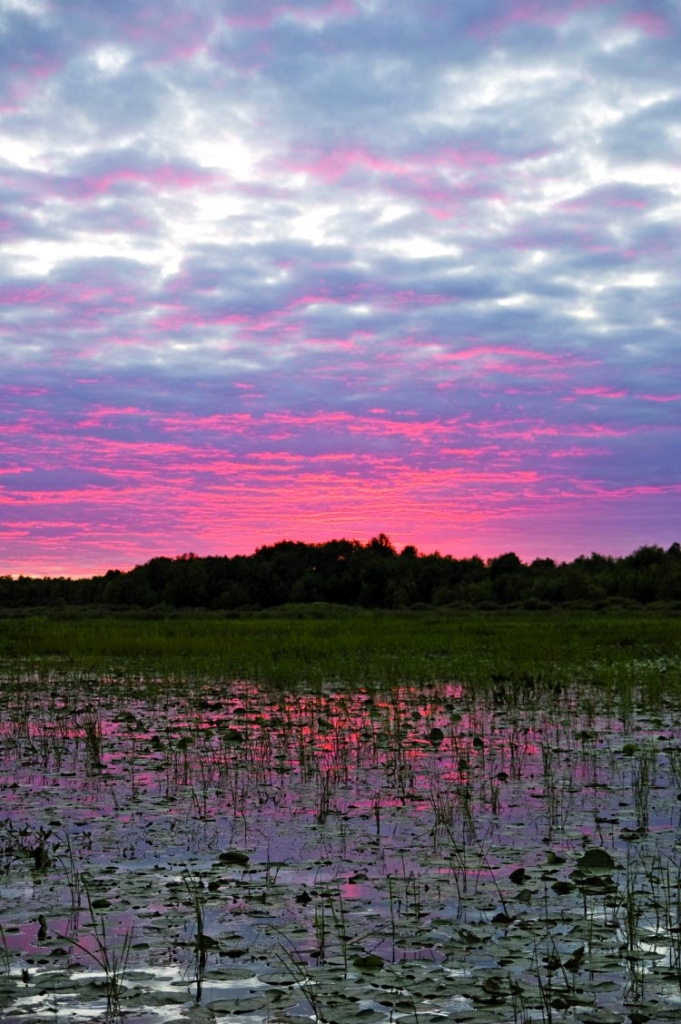
Photo by on the water.com
シャローかミドルレンジのウィードフラットでスイムベイト
Shallow and mid-depth weed flats are another area where largemouth stalk prey during twilight. The difference between these zones and the areas mentioned previously is that the tops of the plants rarely touch the surface. The space above the greenery is where the action unfolds at dusk.
As with daytime flat strategies, concentrate on spots containing something different than the overall uniformity of the area. Rock piles, changes in plant species, old creek channels, patches of pencil reeds, and sandbars are examples. Finding these areas during the day and entering them as GPS waypoints will pay off come evening.
This was the strategy my friend, Craig Lister, and I used last summer. We got on the water in the afternoon and soon patterned largemouth around isolated sand patches and pencil reeds tuffs within weed flats. Many of these zones coughed up bass at dusk.
Craig did well using a 5-1/2-inch Jackall Ammonite Shad rigged on an unweighted 5/0 swimbait hook with a screw-lock keeper. Other solid body, paddle-tail swimbaits are the Berkley Powerbait Rib Shad, Keitech Swing Impact FAT, Reaction Innovations Skinny Dipper, Strike King KVD Swim N Shiner, X-Zone Swammer, Z Man Scented Paddlerz and Zoom Swimmin’ Super Fluke.Craig ties the swimbait to 50- to 65-pound-test PowerPro braid that floats and helps the swimbait stay on top. Here is how Craig described working the swimbait: “The basic retrieve is like hopping a plastic worm across the bottom, but in this case it is across the top of the water,” Lister said. “Make a cast, point your rod tip toward the bait and as soon as the swimbait hits the water, lift your rod tip from a nine o’clock position to an eleven o’clock position, reeling at the same time. This is how you get the swimbait to start swimming on the surface. Keep reeling, dropping and then raising the rod for the whole retrieve. It’s not meant to be fished at a superfast speed, but more of a steady pace. The swimbait’s tail will flicker on the surface. Then, when your rod tip drops for a second before retrieving more line, the swimbait will pause before swimming again. This is usually when the bass strike. The retrieve makes a swimbait look like a baitfish trying to flee by flickering on top.”
Working the surface-subsurface zone, combined with lots of vibration and splashing from the bait’s tail, makes this presentation well suited for low-light largemouth. Weedless rigging lets Craig work it around vegetation and timber without hang-ups.
シャローからミドルレンジのウィードフラットは、薄暗くなった時にラージマウスが捕食のために忍び寄る場所のひとつです。このエリアと前述のエリアとの違いは、植物の先端が水面まで出ていないということです。植物の上のスペースへ薄暗くなったころに出てきて活動しています。
日中のフラット戦略と同様に、エリア全体の似たようなところから何か変化のあるスポットに集中してください。石積み、植物の種が変わるところ、古いクリークチャンネル、アシやガマのパッチ、サンドバーなどがその例です。日中にこれらのエリアを見つけてGPSにウェイポイントとして入力しておき、夕方に再び訪れると効果的です。
これは友人のクレイグ・リスター氏が去年の夏に使った戦略です。午後からフィールドに出て、間もなくウィードエリアの孤立したウィードポケットやウィードフラットの溶岩とアシがある周りのラージマウスが釣れるパターンを発見しました。これらのゾーンの多くは、夕方に多くのバスが釣れました。
クレイグは、ジャッカル・アンモナイトシャッドの5.5インチをスクリューロック式キーパーの付いた5/0スイムベイトフックのノーシンカーでよく釣りました。その他のシャッドテールワームは、Berkley Powerbait Rib Shad(バークレイ・パワーベイト リブシャッド)、Keitech Swing Impact FAT(ケイテック・スイングインパクトFAT)、Reaction Innovations Skinny Dipper(リアクションイノベーション・スキニーディッパー)、Strike King KVD Swim N Shiner(ストライクキング・KVDスイミンシャイナー)、X-Zone Swammer(Xゾーン・スワマー)、Z Man Scented Paddlerz(ジーメン・センテッドパドラーZ)、Zoom Swimmin’S Super Fluke(ズーム・スイミングスパーフルーク)があります。
クレイグはスイムベイトを50〜65ポンドのPEラインに結び、スイムベイトが水面に浮きやすくなるようにします。 「このルアーの基本的なリトリーブは、ボトム沿いを巻いて時々跳ねるようにするのですが、この場合は水面です。」クレイグ氏は言います。「キャストをしたらロッドティップはルアーの方に向いていますが、スイムベイトが着水したらすぐに、ロッドティップを9時の位置から11時の位置まで上げ、同時に巻き取りを始めてください。これで、着水と同時に水面を泳がせることができます。リトリーブ全体を通してリールは巻き続け、ロッドは下げずに上げ続けてください。これは超高速で釣るということを意味しているのではなく、より安定したペースで行うということです。スイムベイトのテールは水面で細かく振動します。そのとき、リトリーブ中にロッドティップを1秒だけ下げることで、スイムベイトが一時停止し、再び泳ごうとします。この時がバスがバイトしてくるときです。このリトリーブにより、スイムベイトはベイトフィッシュが水面で細かく振動して逃げているように見えます。」
水面や水面直下でこのルアーのテールから大量の振動とスプラッシュの組み合わせが生まれることで、ローライトのラージマウスバスに最適なプレゼンテーションになります。またウィードレス性の高いリグなので、ウィードやウッドカバー周りでも有効だと言います。

Photo by on the water.com
歴代の人気記事


ショアラインのウェイキング
Bank habitat contains many areas to catch bass. The section of water adjacent to shore is full of life including frogs, baitfish, and crayfish. Should they fall into the water, chipmunks, mice, dragonflies, and other terrestrial critters are also on the menu.
Largemouth tucked under docks, fallen trees, and other shady spots come out to feed on an array of prey near the shore as light fades. The bank, as well as shallow drop-offs, are natural contours fish relate to when roaming for food; likewise for inside and outside weed lines. Expect points to hold active bass too, so be sure to cast to these spots.
Watch for shoreline variations: a natural bank comprised of trees, grass, and reeds that changes to structure such as riprap, boulders, or a concrete wall. Edges such as this will concentrate bass. Similarly, largemouth mill around isolated rocky reefs or strewn timber found on sand and pea gravel bottoms.
A wake bait is an excellent pick for fishing shorelines because its surface disturbance attracts bass from a wide area the bass home in on the lure’s wake. Rattles add another sound dimension that appeals to largemouth. Popular wake baits include the LiveTarget Bluegill Wakebait, Livingston Lures Pro Wake, Lucky Craft LC Wake Crankbait, Mann’s Baby 1 Minus or Rapala DT Fat Crankbait, Storm Arashi Waking Crank, and Yo-Zuri 3DB Series Wakebait.A straight swimming retrieve accented with an occasional pause is all it takes to catch largemouth on a wake bait. Be on the lookout for cover, such as standing timber and lily pads. Change the rod angle to steer the lure towards these obstructions since bass often lurk nearby. Contacting the obstacle with the bait can also trigger bites.
I use a 7-foot, 2-inch moderate, medium-heavy casting rod to toss wakebaits for largemouth. Monofilament in 12- to 15-pound-test get the nod for its cushiness and floating properties.
As the day draws to a close on your favorite lake this summer, try these strategies for catching low-light lunkers. Tossing lures into twilight will add more bass to the day’s tally, quite possibly the biggest ones to boot.
バンク沿いというのはバスをキャッチする多くの要素があります。岸に隣接する水域には、カエル、ベイトフィッシュ、ザリガニなど、生命にあふれています。シマリス、ネズミ、トンボ、などの陸生動物も水面に落ちればメニューの仲間入りになります。
桟橋、レイダウンツリー、その他のシェードの下に隠れているラージマウスバスは、光が少なくなるにつれて、岸近くにいる餌を食べさせるために出てきます。バンクは、シャローのブレイクラインと同様に、魚がフィーディングのために回遊するときに頼りにする自然の道筋です。ウィードのインサイドエッジとアウトサイドエッジについても同様です。岬も高活性なバスがいることが期待できるため、これらの場所にキャストするようにしてください。
ショアラインの変化に注意してください。木、草、葦なそできている自然の岸が、資材、岩、コンクリート護岸などに変化します。このような変化にバスは集中します。同様に、砂や砂利のボトムにある孤立した岩や流木の周りもラージマウスバスが多くいます。
ウェイクベイト(トップで使うクランクベイト)は、ルアーが通った時に発生する水面の乱れがバスを広い範囲から引き寄せるため、ショアライン沿いの釣りに最適です。ラトルサウンドはラージマウスバスにアピールするもう一つの要素になります。
人気のウェイクベイトには、LiveTarget Bluegill Wakebait(ライブターゲット・ウルーギルウェイクベイト)、Livingston Lures Pro Wake(リビングストンルアーズ・プロウェイク)、Lucky Craft LC Wake Crankbait(ラッキークラフト・LCウェイククランクベイト)、Mann’s Baby 1 Minus(マンズ・ベビーワンマイナス)、Rapala DT Fat Crankbait(ラパラ・DTファットクランクベイト)、Storm Arashi Waking Crank(ストーム・アラシ ウェイキングクランク)、Yo-Zuri 3DB Series Wakebait(ヨーヅリ(デュエル)3DBシリーズウェイクベイト)があります。
ラージマウスバスを釣るのなら、ストレートリトリーブに時々ポーズというアクセントを入れるだけです。立ち木やリリーパッドなどのカバーを探してみましょう。バスは大抵その近くに潜んでいるので、ロッドの向きを調整して、これらの障害物に向かってルアーを操縦してください。障害物にルアーに接触させることで、バイトを引き起こすこともあります。
私はラージマウスバス用のウェイクベイトを投げるのに7フィート2インチのミディアムヘビーのベイトロッドを使います。 12から15ポンドのナイロンラインが滑らかさと浮力があり、向いているでしょう。
次の夏は、あなたのお気に入りの湖で一日が終わりを迎えるころ、薄暗いなかでランカーをキャッチするためにこれらの戦略を試してみてください。その日の締めくくりとして、その日の最大魚は薄暗いところからやってくることでしょう。

Photo by on the water.com
いかがでしょう。
夏の夕方、薄暗くなったころはその日の終わりが近づくサインでもあるため、少し寂しいような、そんな気持ちになります。
レンタルボートで出ている方も、帰着間際の寂しさというのはいつになってもなくならないのではないでしょうか。
そしてそんな気持ちの中、皆さんがビッグワンを狙って最後の最後のギリギリまでキャストを続けるという行動をとることも、私はよく知っています。私も同じだからです。
まあ、結果は、ね。なかなか、うまくはいかないのですけども(笑)
この記事のルアーは基本的にトップウォーターかサブサーフェスで使うルアー(または使い方)が紹介されていました。
結局のところ夕まづめですから、他にもどんなルアーを使っても釣れる時間帯ではあると思います。
なぜ水面の方がいいのかというと、地上が暗くなってきたときは水中も暗くなります。水中が暗くなってくると、一番明るいのは水面ですから、見上げてみると何か動くものがあれば影が見えて、一番目立つんですよね。
おそらく、スイムベイトやクランクベイトが水面を通るときに動かす水の波動や引き波すらも影となって見えると思います。
バスはそういう「足跡」のようなものを追ってくる場合もありますから、まずは水面から水面直下で使いやすいルアーが紹介されているのでしょう。
そして薄暗くなってきた時のオーバーハングやブッシュへのキャストは非常に難しいです。引っ掛けてしまうことも多いということで、スナッグレス性の高いフロッグやオフセットフックセッティングのスイムベイトがオススメされるのも非常に理にかなっていると思います。
日が暮れはじめると暗くなるまで早いですから、根掛かりを回収する時間も惜しくなるので、こういうルアーで効率よく攻めていきたいものですよね。
夏が楽しみですね。
それではまた。
毎度ありがとうございます!