拾ったルアーを甦らせる方法

Photo by scout.com
こんにちは!店長の小山です!
本日は海外サイトより、”How to Restore Old Fishing Lures”という記事を引用してご紹介いたします。
引用先:scout.com”How to Restore Old Fishing Lures”By Walker Smith – Jul 4, 2016(海外サイトです)
皆さんは釣りをしていて、誰かが失くしたであろうルアーを見つけたり拾ったりしたことはありますでしょうか。
「あー根掛かったー」と思いながらラインを引っ張ると、あれ?なんか重いぞ…と思ったらラインのついたルアーが付いてきたり、減水した野池の岸際を歩いていると、木の枝にがっちり引っ掛かってぶら下がっているルアーがあったりしますよね。
最初は「おっ、ラッキー!」と思うのですが、そういったルアーは水中で泥をかぶっていて、とても汚れています。
その場で水洗いしただけではまったく綺麗になる気配がなく、「こんな汚いルアー持ち帰ってもなあ…」と思い、結局ゴミ箱へ捨ててしまうなんてこともあるかもしれません。
でも、ちょっと待ってください。
ルアーというものは大変高価なものですから、そのルアーとの出会いを無駄にする手はありません。
この記事は、そんな拾ったルアーでもお金をあまりかけずにきちんときれいにして、ショールーム並の輝きを取り戻す方法が書かれています。
もちろん、自分のタックルボックスの奥の方にある古びてしまったルアーも甦らせることができますので、ぜひともリサイクルフィッシングライフを楽しんでいただきたいと思います。
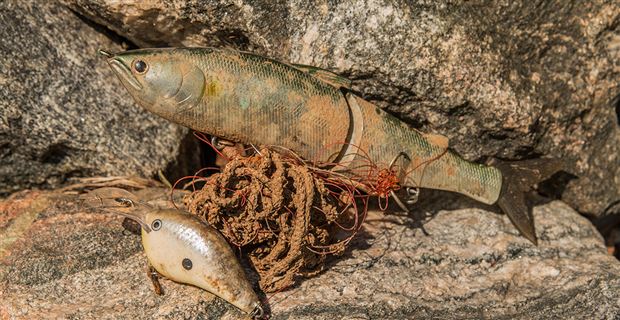
Photo by scout.com
ステップ1:フックとスプリットリングを外す
The hooks and split rings are the first thing to go when a lure is forgotten or abandoned. The metal quickly gathers rust and in a matter of days they can be entirely useless.
So before I began the restoration process, I took a pair of side cutters and removed all of them; even if they looked remotely salvageable. They can be replaced easily and don’t cost much, so it’s simply not worth the risk for me. In addition, this makes the cleaning process much easier and safer.
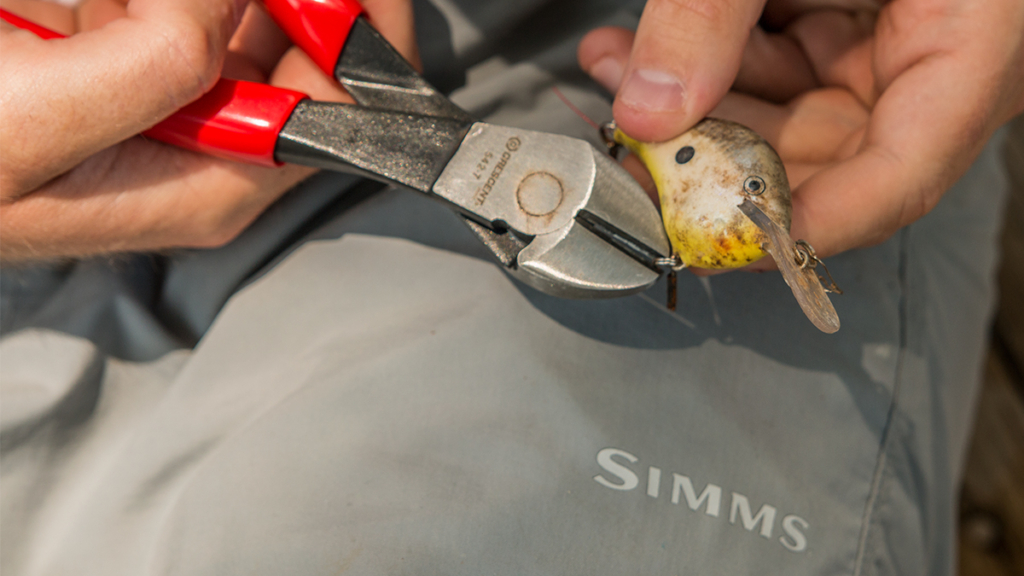
Photo by scout.com
フックとスプリットリングは、放置されたルアーを手入れするときに最初に手を付けるパーツです。 金属はすぐに錆びてしまい、数日で完全にダメになってしまいます。
修復作業を始める前に、ニッパーを手に取り、それらすべてを取り除きます。 たとえそれらがまだ使えそうであったとしてもです。 これらは簡単に交換することができますし、多くの費用もかからないので、リスクを冒すほどの価値はありません。 さらに、これにより、この後の洗浄プロセスがずっと簡単に、かつ安全になります。
ステップ2:お湯ですすぐ
Once the components are removed, it’s important to rinse the lure with warm water to remove as many abrasive impurities as possible. If you start scrubbing beforehand, there’s a big chance you will cause irreparable damage to the lure’s clear coat and paint.
It’s tempting to rub the surface of the lure with your fingers during this process, but avoid it if possible. Instead, use the spray setting on your kitchen sink to rinse any stubborn areas.
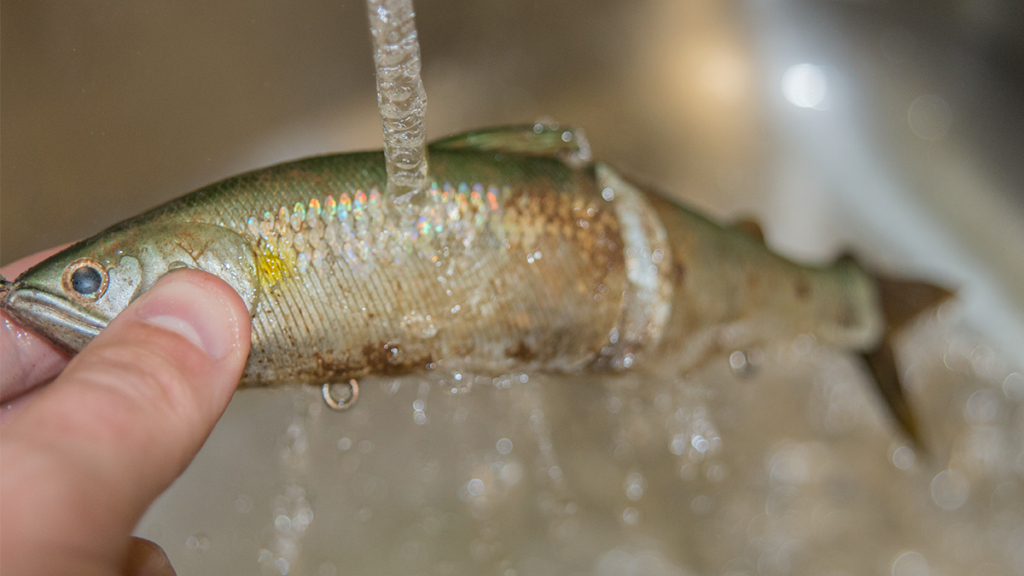
Photo by scout.com
部品が取り除かれたら、大まかな汚れを取り除くために、温水でルアーをすすぐことが重要です。 いきなりゴシゴシ洗ってしまうと、ルアーのクリアコートや塗装に修復不能な傷をつけてしまう可能性があります。
このプロセスでは、ルアーの表面を指でこすってもいいのですが、可能ならば避けてください。 代わりに、キッチンシンク(流し台)の蛇口をシャワーにして、頑固な部分をすすいでください。
ステップ3:台所用洗剤で優しく洗う
When you’re able to run your fingers over the lure without feeling any dirt, apply a liberal amount of Dawn dish soap to a wet paper towel and gently scrub the surface of the lure. This will remove a large majority of the grime.
Every few seconds, feel the lure with your bare hands. The smoother the surface, the harder you can scrub with the wet paper towel.
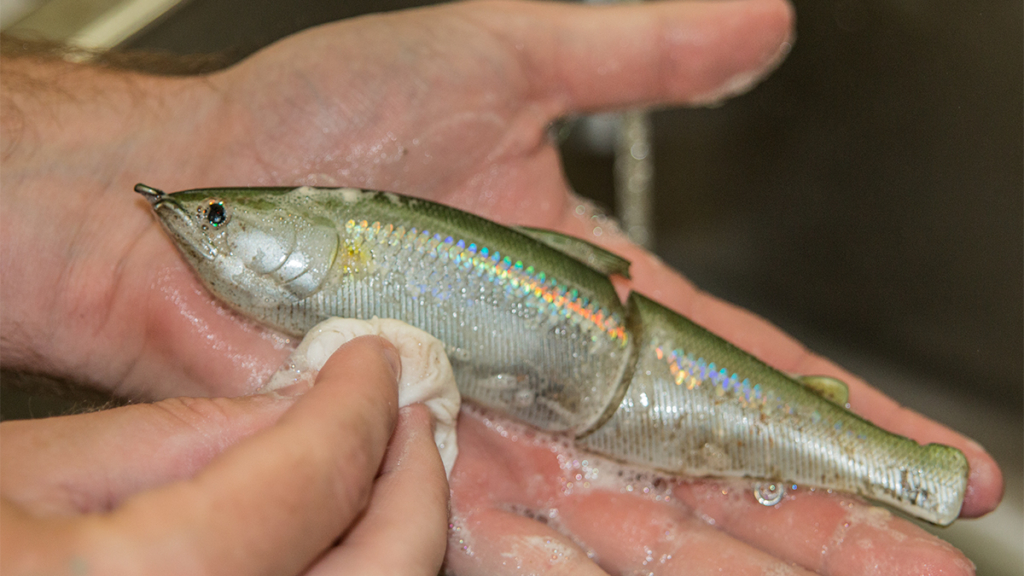
Photo by scout.com
ルアーの表面を指でなぞって汚れを感じることができなくなるまで、濡れたペーパータオルに台所用洗剤(ママレモンやチャーミーグリーン)を塗り、ルアーの表面を優しくこすります。 これで汚れの大部分を除去できます。
数秒ごとに手でルアーを感じてください。 表面が滑らかになればなるほど、濡れたペーパータオルで激しくこすっても大丈夫です。
ステップ4:トイレ用洗剤と歯ブラシで洗う
While the dish soap will make a big difference in the lure’s appearance, there will still be some bad areas that need attention. Do not—and I repeat—do not use any harsh cleaners that contain alcohol. They are likely to strip the clear coat and paint from the lure, leaving you with an ugly pile of wood or plastic.
A non-abrasive toilet bowl cleaner and a soft-bristled toothbrush will work wonders. Spray a liberal amount of the cleaner directly onto the lure, wet your toothbrush and lightly scrub the problem areas; I’ve found a tight circular motion to be most effective.
Repeated rinsing is suggested throughout this process in order to avoid removing the clear coat or paint. I scrubbed for about 20 seconds, rinsed, checked to make sure the lure was holding up, reapplied the cleaner and continued scrubbing.
Be sure to scrub the bill or, when applicable, any joints in the lure. These areas often contain the most crud after being exposed to the elements.
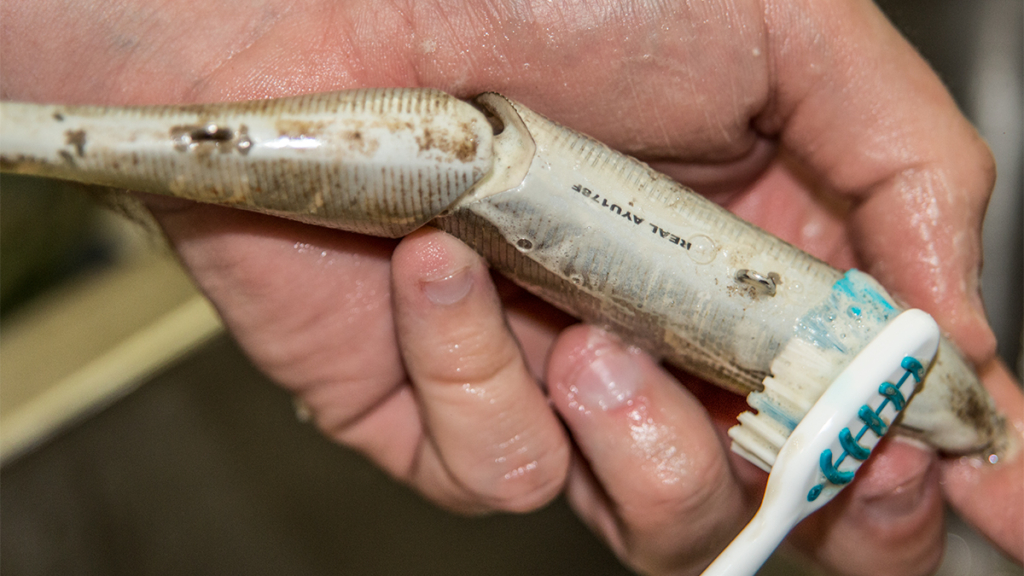
Photo by scout.com
台所用洗剤でルアーの外観はかなりきれいにできますが、まだ汚れが残っている部分があるはずなので注意が必要です。 アルコールを含む強い洗剤は使用しないでください。 それらはルアーからクリアコートとペイントをはがし、ただのプラスチックや木材のかたまりにしてしまう可能性が高いです。
非研磨剤の便器クリーナー(トイレマジックリンなど)と柔らかい毛の歯ブラシは、効果てきめんです。 適量の洗剤を直接ルアーにスプレーし、歯ブラシを濡らし、問題のある部分を軽く掻き取ります。 私が最も効果的だと思うのはタイトな円運動だと思います。
ルアーのクリアコートまたは塗装が落ちてしまうことを避けるために、このプロセス全体を通して繰り返しすすぐことをおすすめします。 私は約20秒間洗ったらすすぎ、ルアーの状態を見て、再びクリーナーをかけ、洗浄を続けます。
リップやジョイント部分があるルアーの場合はそこもよく洗ってください。 これらの部分は、長期間放置されたときにもっとも汚れが溜まりやすい部分のひとつです。
ステップ5:よくすすぐ
Rinse all of the cleaner off of the lure with warm water. For good measure, I took my lures outside and sprayed them thoroughly with a hose. This will remove the remainder of the impurities.
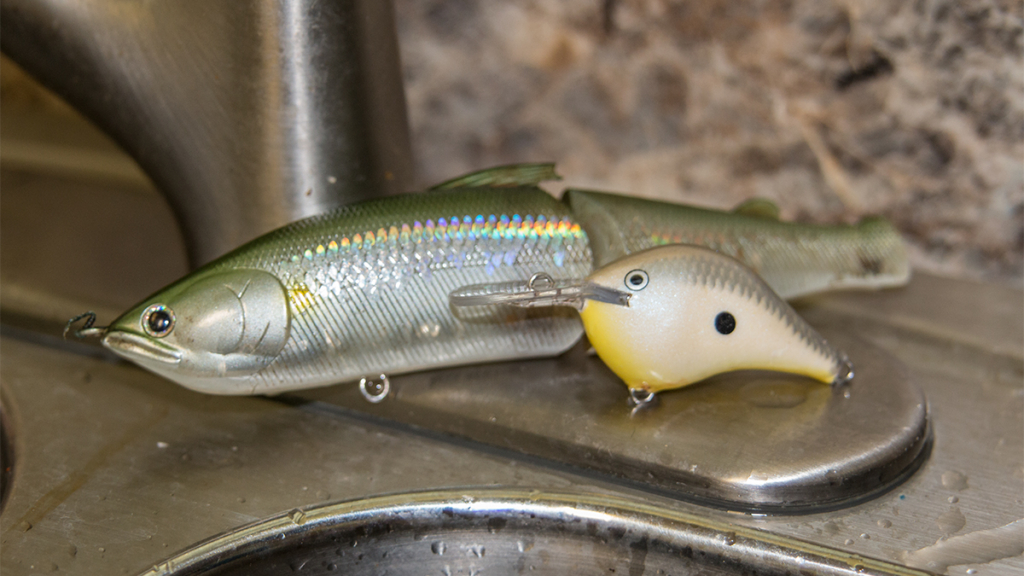
Photo by scout.com
ぬるま湯で洗剤をすべて洗い流してください。 さらに加えると、私はルアーを手に持ち、シャワーホースで徹底的に流しました。 これにより、残りの不純物が除去されます。
ステップ6:軽くオイルを注す(ジョイント系ルアーの場合)
This isn’t a necessary step for traditional hard lures, but if you’re lucky enough to find a fancy glide bait or swimbait, it helps to apply a light household oil to any moving parts.
The joint of my Lucky Craft Real Ayu 178 glide bait were toast; they would barely move side to side. After applying some Lucas Tool Box Buddy and working the joint back and forth, the lure performed flawlessly within 20 seconds or so. I was pretty surprised, actually.
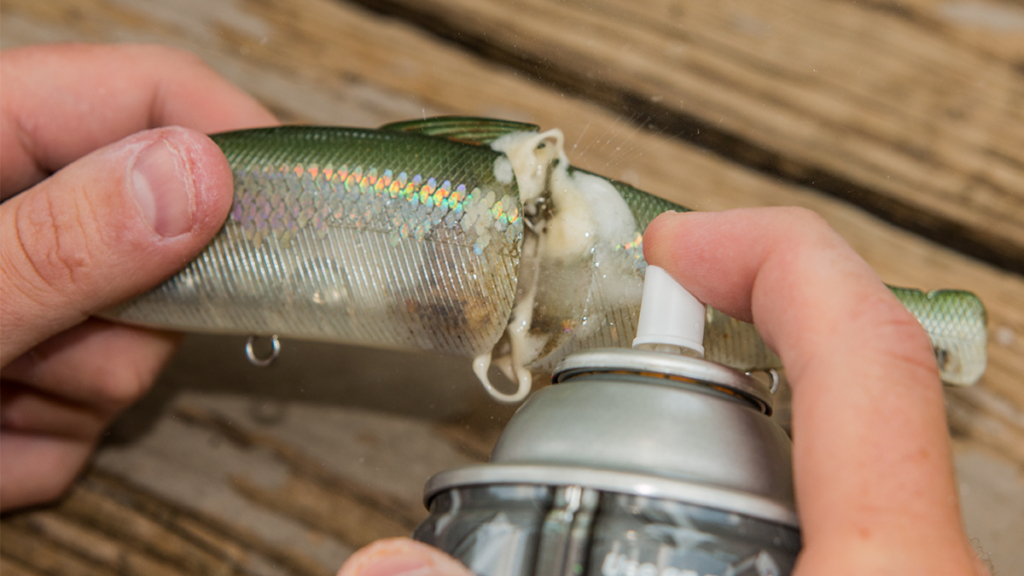
Photo by scout.com
これは普通のハードルアーには必ずしも必要なステップではありませんが、幸運にもS字系ルアーやスイムベイトを拾ったのであれば、可動部分に軽く潤滑油(クレ・CRC 5-56など)を吹いてみましょう。
私のラッキークラフトリアルアユ178グライドベイトのジョイント部分は錆びていました。 これではほとんど横に動かないでしょう。 Lucas Tool Box Buddy(アメリカの錆びとり潤滑油)を使ってジョイントを左右に動かしたところ、ルアーは20秒もしたら完璧に動くようになりました。 これにはかなり驚きました。
ステップ7:車用スピードワックスをかける
At this point in the restoration process, both of my lures were looking pretty darn good. At first glance, it looked almost as if they’d just been removed from the package. But they lacked any shine or luster.
I didn’t think this would work, but it did: I sprayed a bunch of Lucas Slick Mist Speed Wax on the lures and let it sit for approximately 5 or 10 seconds. Next, I took a microfiber rag and rubbed them until dry. With a separate, dry microfiber, I polished the surfaces and the results were incredible.
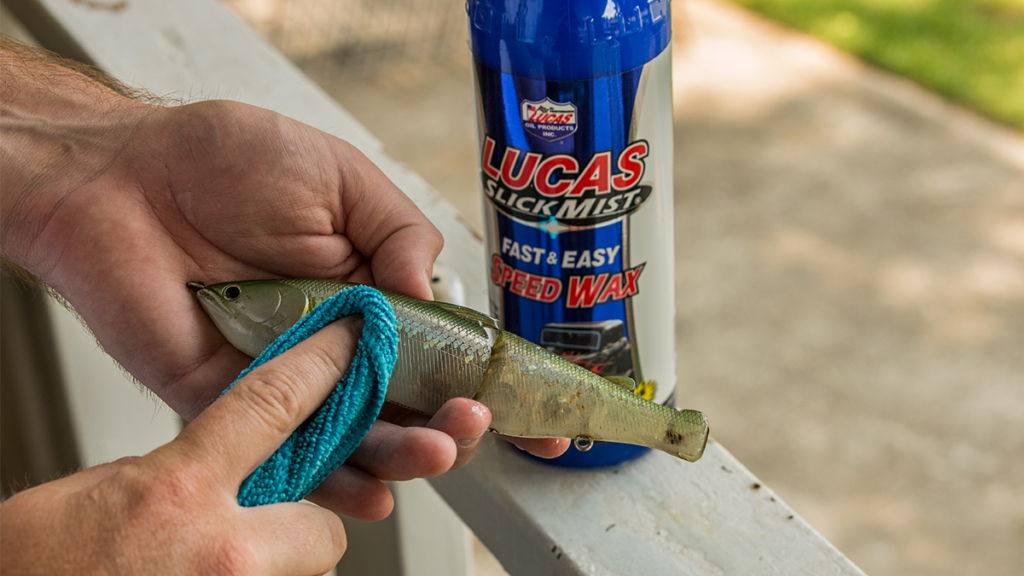
Photo by scout.com
修復プロセスもここまでくれば、ルアーはかなりきれいになっているはずです。 一見すると、まるでパッケージから出したばかりかのように見えます。 しかし、まだ光沢や輝きを失っています。
私もこれはうまくいくとは思っていませんでしたが、ルアーにLucas Slick Mist Speed Wax(車用のスプレーして拭き取るだけのワックス)をルアーにスプレーして約5秒から10秒間まち、マイクロファイバータオルで乾燥するまで拭き取りました。そして別の乾いたマイクロファイバータオルを使用して表面を磨いたところ、信じられないほどツヤツヤになりました。
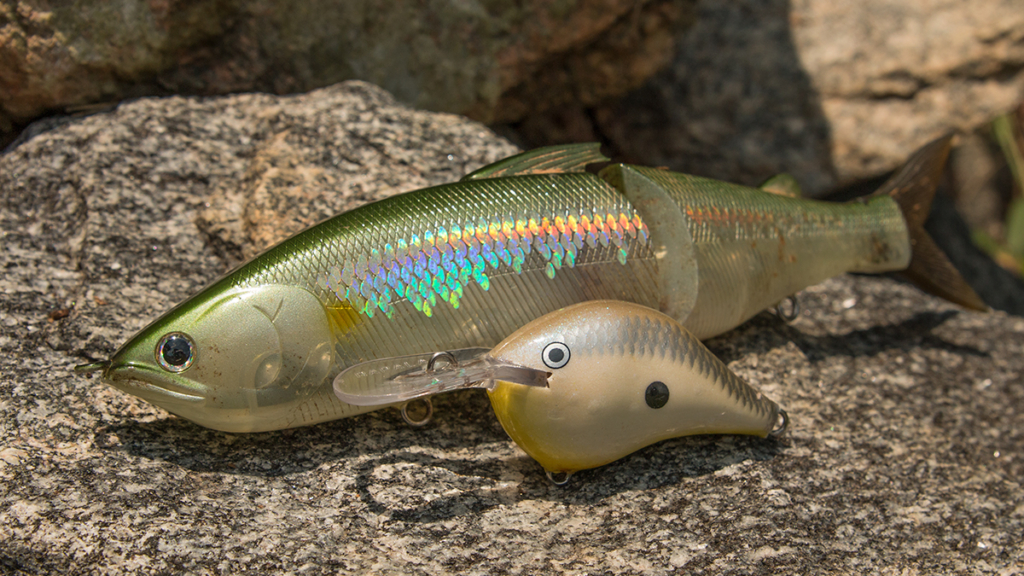
Photo by scout.com
I couldn’t be happier with how my project turned out. As you can see from the photos, this process made a big difference and allowed me to turn two nasty lures into fully functioning, beautiful additions to my collection.
このプロジェクトにより私がどれほど幸せになったのかわかりません。 写真からわかるように、このプロセスは大きな違いをもたらし、2つの汚れたルアーを美しく完全に機能させ、タックルボックスに加えることができました。
いかがでしたか。
記事の中に使われている洗剤なども、どのご家庭にもありそうなものがほとんどですし、肩身の狭いパパさんの場合は台所に立ち入ると怒られたりしますので、そういう場合は洗剤くらいは新たに購入してもいいくらいの安さです(笑)
これで、もし次に釣り場で落ちているルアーを拾った時も、無視する必要はなくなったと思います。
もし自分では使わないなと思った場合でも、拾って綺麗にしておくことで、釣りをしない方が気付かずに怪我をしてしまうことも防げますし、ある程度まとまったらリサイクルショップに売りに行けば、汚いままよりもはるかに良い査定をされることでしょう。
こういったリサイクルフィッシングは一見すると、新品を売る釣具屋さんにとっては売上が上がらず、ダメージのように取られがちですが、長い目で見ると釣り業界や釣りそのものの寿命を伸ばしてくれる行為だと思いますし、自分の道具も他人の道具も長く大切に扱ってくれる釣り人が増えることを新品の釣具屋さんも望んでいる事と思います。
リサイクルアングラーさんはぜひ誇りを持って楽しんでくださいね。
ちなみに、当店ではそんな拾ったルアーでも買い取り大歓迎でおこなっておりますので、処分に困ったルアーはぜひ当店まで送ってくださいね!
それでは、また。
毎度ありがとうございます!


