バス大好き!?ラバージグの世界:後編
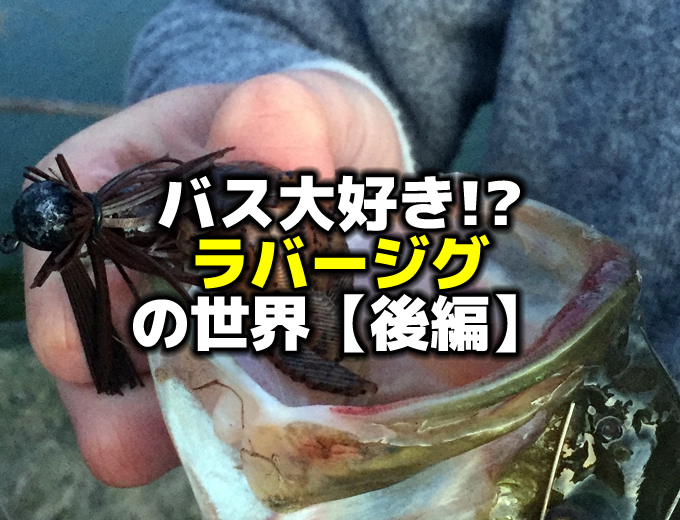
Photo by anglr.com
こんにちは!店長の小山です!
本日は海外サイトより、”Bass Fishing Jigs Bass Fishing for Beginners Part 6”という記事を引用してご紹介いたします。
引用先:anglr.com”Bass Fishing Jigs Bass Fishing for Beginners Part 6”by Jonathan Dietz(海外サイトです)
本日は前回の前編の記事に引き続きまして、全2回中の後編になります。
前編をご覧になっていない方はぜひご覧くださいませ。
https://wp.me/p7t7tG-28m
この記事は、アメリカのバス釣り用アプリメーカー「ANGLER社」のブログ記事で、初心者さん用に書かれたラバージグのハウトゥ記事です。
前回はフィリッピングジグ、ストラクチャージグ、スイミングジグについてでした。今回はさらにトレーラーやジグのカラーなどについても触れているようです。
早速読んでいきましょう。
スキッピングジグ
Skipping jigs are a lot like swim jigs, other than the head style. You can fish them with the same equipment and fish them in a similar style. The one thing to note, is the head style. When you were a kid and were looking for a rock to skip across the water, what type of rock did you look for? Not the big round uneven ones, you looked for thin flat rocks that would skip for miles.
This is the same case for skipping jigs, the flatter the jig the easier it will be to slide it under docks, trees, or overhanging bushes. The same applies for the trailer, a flat trailer makes it easier to skip as well. To get this bait to skip, you want to make a side armed roll cast, making a C with your rod tip. A soft tip is key to allowing the proper transfer of energy from your rod to the bait. The bait needs to be fairly even with the water to allow it to slide across the surface. This goes back to skipping rocks, when you went to throw a rock you got down low with your arm to have a closer release point to the height of the water.
This puts less pressure on the surface of the water, allowing the jig to slide across instead of making a loud thud and going five feet, leaving you with a beautiful backlash. Anyone who has ever learned to skip a jig will tell you straight up, you’re going to backlash your reel. So throw that fear out the window because it’s going to happen. Tightening all the brake systems will only make things worse, but it’s recommended at first to get the motion down.
Selecting The Right Size Skipping Jig
To start out, you can never go wrong with a ⅜ ounce jig. This lighter jig is easier to skip because the lighter weight puts less stress on the surface tension of the water and less force is needed to get it to skip. It’s like trying to skip a small rock vs. a big rock. The small rock doesn’t require you to break you shoulder trying to skip it.As you get a handle on skipping the ⅜ ounce jig, you can work up to a ½ ounce jig. This can play a role if you fish a heavily pressured lake. The faster fall of a ½ ounce jig can give the fish a different look after they have seen a million ⅜ ounce jigs.
Never be afraid to step outside the box when targeting bass!
After you get the skipping aspect down, now it’s time to focus on what do you do once it skips under your target. You have two options, you can either let it sink and hop it or drag it out. You can also swim it out to target suspended fish.
When people think about skipping docks, they think shallow along the banks. This is one area, but fish will also suspend under deeper docks. Thus a skipped jig that is swam out makes for a great presentation for those suspended fish. The shallower docks can be fished by skipping it and letting it sink and then dragging it out or hopping it a couple times and then moving on to your next cast.
スキッピングジグというのは、他のヘッド形状で見るとスイミングジグのものによく似ています。同じタックルで釣り、同じスタイルで釣ることができます。ひとつ注意すべき点は、ヘッド形状です。あなたが子供のとき、水面を水切りする石を探していたと思いますが、そのとき、どんなタイプの石を探していましたでしょうか? 大きくて丸くてデコボコしたものではなく、薄くて平らなものが何回も跳ねそうだと探していたはずです。
これは、ジグをスキッピングする時にも同じことが言えまして、ジグを平らにするほど、桟橋、樹木、オーバーハングブッシュの下に滑り込ませるのが簡単になります。同じことがトレーラーにも適用され、平らなトレーラーによってスキッピングするのがより簡単になります。このルアーでスキッピングするには、サイドハンドでロールキャストして、ロッドティップで「Cの字」を描くようにします。ソフトティップはロッドからルアーへのエネルギーの伝達を適切にするための鍵です。ルアーは水面を滑って行くことができるように、水面と平行にする必要があります。これは、石を水切りする場面に戻りますが、石を投げるとき、あなたは腕を低くして水面の高さに近い位置で手を放したはずです。
これにより、水面にかかる圧力が軽減されますが、ジグを1.5メートル先から滑らそうとするとズボッと水面に突き刺さり、美しいバックラッシュが出来上がります。ジグのスキッピングを学んだことがある人なら誰でもまずあなたに教えるでしょう、これはバックラッシュしやすいですよと。バックラッシュしやすいのを分かったうえで、恐れずに投げましょう。リールのブレーキシステムを締め付けるのは実はあまり良いことではなく、まずは力を抜いた動作をお勧めします。
スキッピングジグは正しいサイズを選ぶこと
まずはじめは、3/8オンスのジグを使えば間違いありません。より軽いジグは軽い重量のおかげで水の表面張力に及ぼすストレスを少なくし、スキップするために必要な力がより少なくなるため、スキッピングが簡単になります。これは小さな石と大きな岩はどちらが水切りしやすいかというようなものです。小さな石は、あなたがそれを投げて水切りさせるときにあなたの肩を壊す心配がありません。
3/8オンスのジグをスキッピングするのに慣れてきたら、1オンスのジグまで投げることができるはずです。激しいフィッシングプレッシャーを受けたフィールドで釣る場合、これは重要な役割を果たします。 多くの魚が3/8オンスのジグを見慣れているところに1/2オンスのジグの早いフォールを見せると、その魚に別の見た目の印象を与えることができます。
バスを狙う時は既存の考えにとらわれないでください!
スキッピングをマスターしたら、次はターゲットの下にスキッピングしてから何をするかを考える番です。 2つのオプションがあります。沈ませてホップさせるか、ズル引きするか。またはサスペンドフィッシュを狙ってスイミングさせるかです。
人々が桟橋にスキッピングしようと考えるとき、バンク側の浅い方へ投げようと考えます。あるエリアでは、魚は桟橋の深い側の水面直下でサスペンドしたりもします。したがって、スイミングジグをスキッピングで入れることは、それらのサスペンドフィッシュにとって素晴らしいプレゼンテーションになります。より浅い桟橋であれば、スキッピングしたら沈めてズル引きしたりホッピングさせたりしたのち、次のキャストに移動します。
フィネスジグ
There is a large category of jigs that are technically classified as “finesse jigs”. The term finesse is merely a simplification that is describing a less intrusive form of a jig. This means it could be a football jig, ball head jig, flipping jig, swim jig, etc. These are classified by a lighter wire hook, thinner weedguard, thinner skirt and lighter weight.
This category is defined by taking the big bites that jigs get, and downsizing that for situations when fish are finicky or very pressured. These jigs are often used in the winter when fish are extremely lethargic. They also play a role on super clear bodies of water where you want to throw something a little smaller on lighter line. Finally, finesse jigs work well on fisheries that are extremely pressured where you’ll want to downsize your presentation.
Make no mistake, these finesse jigs will still get big bites.
Fish a finesse jig the same way you’ll fish most jig techniques. You still want to use a medium heavy rod, paired with 10-16 pound line depending on water clarity. This will give the bait a more natural fall and allow light jigs to still sink at a fast rate. The way you fish these baits will remain the same, they are still jigs. This is just a presentation that is meant to show the fish a different look.
技術的な意味合いとして「フィネスジグ」と大きく分類される種類のジグがあります。フィネスという用語は、ジグの中でもおとなしめのものを言い表したものを簡略化したものです。これらは細軸ワイヤーフック、細いウィードガード、薄いスカート、軽量であるときに分類されるということですので、フットボールジグ、ラウンドヘッドジグ、フリッピングジグ、スイムジグのなかにも存在していることを意味します。
このカテゴリは、バスが非常に高いフィッシングプレッシャーを受けて気難しくなっている時などにビッグバイトを得たいということで小型化するというところに定義されます。これらのジグは、魚が極度に無気力になる冬によく使用されます。これらはまた、より細いラインで小さいものを投げたくなるようなクリアウォーターのフィールドでも役割を果たします。結論としては、フィネスジグは、フィッシングプレッシャーなどでジグを小型化したいようなフィールドで効果的です。
フィネスジグは間違いなくビッグバイトを得られます。
ほとんどのジグを釣るテクニックと同じ方法でフィネスジグは釣れます。ミディアムヘビーロッドに水の透明度に応じて10〜16ポンドのラインを使うようにしてください。これはより自然なフォールを与え、軽いジグを速い速度で沈めることを可能にします。これはラバージグなのです。他のと同じ方法で釣ってください。これはただ、魚に対して異なった外観を示すためのものなのです。
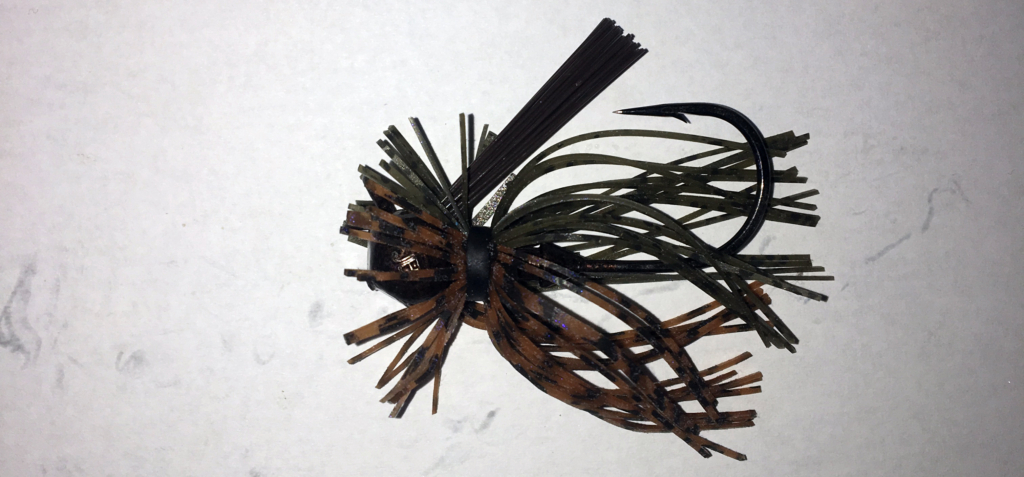
Photo by anglr.com
トレーラー
Possibly the most overlooked aspect of a jig, is the trailer that is put on the back of it.
People worry too much about matching the color of the trailer to the jig and making sure it pair up perfectly. When you look at a trailer, three things should be on your mind.
- What is the water color and temperature?
- What are you trying to imitate?
- What fall rate are you looking for?
These three questions will help you limit how many different trailers you need to buy.
As far as water color is concerned, the trailer is the same concept as the jig. In off-color or dirty water, you want a darker, more solid color. In clear water, you’ll want a lighter, more translucent color. Water temperature is big as far as the action you want out of the trailer. In colder water everything is slower. This means you need to emulate that in your jig.
You won’t want an aggressively kicking trailer in 40 degree water. You want to look for something like a standard chunk style bait that has very little action. As the water warms up you can start adding more “extra” movement to the bait. Extra movement is the movement that comes outside of what you as the angler impart on the bait. This comes from ridged edges on the trailer that allow the water to push the legs on a bait around as it falls or the current moves it.
Focus On Imitating The Forage
When it comes to the what you are imitating, think about what each different bass food group looks like. Shad do not have a lot of action, they more or less rock side to side as they swim through the water column. This can be imitated with swimbaits or chunk style baits if you are swimming your jig. Bluegill have a more erratic movement, so a trailer that has more action usually has better results when targeting bass around bluegill. Crayfish can be imitated with both hard kicking trailers and soft action trailers, it just depends on what the fish want.
The action of the trailer also dictates how fast or slow a bait will fall. A bait that has a lot of movement will inhibit that bait from falling quickly. The water pressure and the edges on that bait will slow the fall of the bait through the water. This can be useful in grass or around wood to give fish more of a chance to pick the bait up as it sinks. This also goes for dirty water, a hard action trailer will put off more vibration for the fish to pick up the vibration in their lateral line.
A softer vibration or trailer with less movement will allow the bait to fall much faster through the water with little resistance. This can be useful in attempting to trigger a reaction strike out of finicky fish. If a fishery is heavily pressured then a fast fall can sometimes get more bites than a slow fall. This gives the fish only a split second to respond as the jig falls through the water. So, the choice in trailers can make a big difference in the effectiveness of the jig you are throwing.
ジグの釣りで最も見落とされやすい部分は、その後ろに置かれたトレーラーです。
人々はトレーラーの色をジグに合わせること、完全にペアになっているかどうかについてあまりにも心配しています。トレーラーを決める時は、心のなかに3つの事を考えてください。
- 水の色と温度はどうか?
- 何を模倣しようとしているのか?
- フォールスピードはどれくらいがいいか?
この3つの質問は、買うべきトレーラーの数を抑えるのに役立ちます。
水の色に関して言えば、トレーラーはジグと同じ考え方です。濁りが入ったりマッディーウォーターでは、暗くて濃い色が欲しいです。クリアウォーターでは、より薄く、半透明な色がいいでしょう。水温に関しては、トレーラーに望むアクションに関わってくるため重大です。冷たい水温下ではすべてが遅くなります。つまり、それもジグで模倣する必要があります。
水温4℃の水で積極的にトレーラーを動かすのは望ましくありません。アクションをほとんど持たないチャンク系のトレーラーを探すべきです。水が暖まるにつれて、より多くの「余分な」動きをトレーラーに加えていきます。余分な動きとは、釣り人がトレーラーに与える以外にトレーラーが起こすアクションのことです。これはトレーラーに設けられたエッジなどにより、水中で倒れたり、移動したりする際に水を押して水流を引き起こすことを可能にします。
ベイトを模倣することに焦点を当てる
何を模倣したいかを考えるときは、バスの食料となるもののグループがどう見えるかについて考えてみてください。シャッド(ベイトフィッシュ)にはたくさんのアクションはありません。彼らは水中を泳ぎながら、少なからず左右に振って移動しています。スイミングジグを使うならば、スイムベイトやチャンク系のトレーラーで模倣することができます。 ブルーギルはより不規則な動きをしているため、ブルーギルまわりのバスをターゲットにするときは、より多くのアクションを持つトレーラーがより良い結果を出します。ザリガニは、水を蹴るタイプのトレーラーと柔らかいアクションのトレーラーの両方で模倣することができます。それは魚がどちらを好んでいるかによって変えていきます。
トレーラーのアクションはまた、ルアーのフォールがどのくらい速くまたは遅くなるかに関わってきます。動きの多いトレーラーは、そのルアーが素早くフォールするのを妨げます。水圧とそのトレーラーのエッジが水を押すためルアーのフォールを遅らせるでしょう。これは、ウィードやウッドカバーの周りで、ルアーが沈んでいる最中に魚に良く見せて食わせるのに役立ちます。これはマッディーウォーターでも有効で、強いアクションをするトレーラーは、魚が側線でその波動を拾うために、よりバイトしやすくなるでしょう。
優しい波動や動きの少ない柔らかいトレーラーでは、ルアーが抵抗なく水中をすばやくフォールすることができます。これは、気難しい魚からリアクションバイトを得るのに役立ちます。フィールドが強いフィッシングプレッシャーにさらされた場合、速いフォールは時として遅いフォールよりも多くのバイトを得ることがあります。これは、ジグが水中に落ちる時間が少なく魚に一瞬しか反応する間を与えないためです。そういうわけで、トレーラーの選択は投げるジグの有効性に大きな違いを作ることができます。
歴代の人気記事


ジグのカラー
As far as jig colors, keep things simple.
You don’t need every single shade of green, black, blue, and brown. To start off, stick with three general color patterns, and have a few variations within each of these. The three colors to stick with day in and day out are green pumpkin, black and blue, and brown/orange.
Black and blue excels in dirty water, it stands out better against the colored water and allows the fish to find the baits profile easily. An option to add to a jig would be to attach rattles into the black and blue jigs. Rattles are often overlooked and add another element that allows fish to pick on that bait easier. You can also use any form of dip and glow that adds a little color to the bait. Chartreuse stands out very well in murky water.
For clear water situations, stick with the green pumpkins and brown/orange. These colors are the most natural and tend to be the least intrusive on the fish. Try to match the color of the bottom to the color of your jigs.
This is because the natural forages, crayfish, darters, gobies, and sculpins, all tend to be a very similar color to the bottom of that particular fishery.
All of these techniques require different equipment. The line for each of these techniques needs to be paired with the areas that you are fishing. Around wood, dirty water, big rocks, or thick grass, lean toward heavier line. Sometimes as heavy as 20-25 pound line when fishing jigs around heavy wood and rock cover.
When around thick grass and vegetation, never rule out 50-65 pound braided line!
If the water is clearer, or you’re around sparse cover, then you can go lighter and use 12-18 lb test. It all depend on the situation and what you feel comfortable throwing. Some anglers will even pitch jigs with 10 pound line in areas that others would use 18-20 pound line, it’s just a matter of personal preference.
That is something that everyone has to figure out on their own through time spent on the water, fishing. You’ll find baits, line, rods, and reels that you like more than the others. The more time you spend on the water, the more you’ll hone in on your personal preferences.
ジグのカラーについては、シンプルに考えます。
あなたは、緑、黒、青、茶色の全てのカラーの微妙な色違いを揃える必要はありません。まず、一般的な3色にこだわって、その色の中から2、3色の別のバリエーションを持ってください。いつだって有効と言える3つの色は、グリーンパンプキン、ブラック/ブルー、ブラウン/オレンジです。
ブラック/ブルーは濁った水の中でも優れていますが、ステインウォーターに対してより優れており、ルアーを簡単に見つけさせることができます。ジグに追加するオプションは、ブラック/ブルーのジグにラトルを付けることです。ラトルはしばしば見落とされますが、魚がそのルアーをより簡単に選ばせるのを可能にするひとつの要素となります。あなたはまた、ルアーに少しの色を加えるディップやグロー(カラーペンなど)を使用することができます。チャートリュースは暗い水の中で非常に優れています。
クリアウォーターの場合は、グリーンパンプキンとブラウン/オレンジを使ってみてください。これらの色はかなりナチュラルであり、魚に対してでしゃばり過ぎない傾向があります。ボトムの色とジグの色を合わせてみてください。
これは自然のエサである、ザリガニ、ヨシノボリ、ハゼ類などが、そのフィールドのボトムに非常に似た色になる傾向があるためです。
これらのテクニックはすべて、異なるタックルを必要とします。これらのテクニックのそれぞれのラインは、釣りをするエリアに合わせる必要があります。木の周り、濁った水、大きな岩、または濃いウィードは、より太いラインにする必要があります。こういったヘビーカバー周りでジグを使う場合は、20〜25ポンドのヘビーラインを使用します。
厚いマットや濃いウィード周りで釣る時は、PEの50-65ポンドラインを忘れないでください!
水がよりクリアであるか、まばらなカバーの周りで釣る場合は、より細い12~18ポンドのラインを使用することができます。それはすべて状況に左右されますが、あなたが快適に投げやすいかどうかによります。他の人が18〜20ポンドのラインを使うエリアでもあるアングラーは10ポンドのラインでジグをピッチングすることもあるように、それは単なる個人的な好みの問題になります。
それは誰もがフィールドで釣りに費やした時間を通して自分自身で感じなければならないものです。あなたはおそらく他より好きなルアー、ライン、ロッド、リールを見つけるでしょう。あなたがフィールドで費やす時間が長くなればなるほど、あなたの個人的な好みにもっと慣れていきます。
いかがでしたか。
この記事は一応、初心者アングラーさんに向けられたものになるのですが、私がこの記事を読んでみて、全2回を通してとてもためになる内容でした。
前回の記事では私もラバージグの釣りにハマっていたことを少し書きましたが、当時はこんなに専門的な知識は持っていませんでした。見栄を張ってしまったみたいでなんだか恥ずかしいです(笑)
今ではラバージグの多くが細分化され、あらゆるメーカーさんから異なる種類のものが発売されていますから、私がラバージグをちょっとやっていたころよりずっと専門的になっていたんですね。なので、初心者さん向きの記事でもこんなに専門的になっていると、こういうことでしょうか。
古い人は新しいものを受け入れにくい感じになってしまいがちなのですが、なんとか私も素直になって新しいものを覚えて、釣りの幅を広げていきたいものです。
さて、記事に中に出てきたカラーについて、ディップやグローが有効ということが書かれていました。
現場でなにかカラーのアクセントが欲しいと感じた時、非常に有効な手段としてプロの間でも好まれているのが、この「SPIKE-IT DIP-N-GLO(スパイクイット・ディップングロー)」というマーカーペンです。
これはワームやラバージグのスカートなどに直接塗って色を付けるもので、バスの好む匂い成分まで入っています。
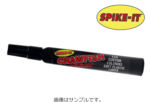
こちらはザリガニの匂いが入ったマーカーペンとなっております。クロー系トレーラーなら爪の部分、ラバージグのスカートなら先の方だけなど、他の方とは違ったカラーリングをバス見せたいとき、現場でササッと出来るのが特徴です。
持ち運びのスペースはほとんどいりませんし、なによりこれだけでバイトのチャンスが上がるという場面に遭遇し、これを使ってまんまとバイトを得た時は嬉しさ倍増でしょう。
ぜひ使ってみてください。
それでは、また。
毎度ありがとうございます!